
PowerShell Module Build in Dev Container
In my earlier post I already mentioned that a next step I want to take is to have the module run in a Dev Container. For the official documentation on what a Dev Container is and a quick start, please go the Visual Studio Code documentation. In short it helps in developing/testing software in a containerized environment, without the need to install software. For example, if you normally develop a PowerShell module in Windows PowerShell 5, you can create a PowerShell 7 Dev Container to run the module on this newer version without requiring installing PowerShell 7. Everything is isolated.
Prerequisites
For this to work you’re depending on Docker Desktop. Docker Desktop can be downloaded from the Docker Website. Read the documentation on the site, Docker is not free in all circumstances.
Another prerequisite is Visual Studio Code, as far as I know Dev Containers is a feature of it and can’t be used in other software. Within VSCode, you’ll need the Dev Containers Extension.
Let’s go
Following the documentation I created a ‘.devcontainer’ folder in the root of my project. Please notice the ‘.’at the beginning. In this folder a ‘devcontainer.json’ file is created.
I started with the definition of the base image in this file:
{
    "image": "mcr.microsoft.com/powershell:latest"
}
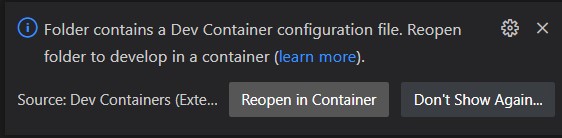
Immediately VS Code detects that you have this definition in your project and asks to open the folder in the container. The first time it might take a while as the image needs to be downloaded from docker hub.
For me this went pretty smooth. VS Code opens, the project/folder opens and there is basically no change. If you look a little closer you migth see that the terminal prompt is changed from PowerShell to bash and the file system is Linux based. On the bottom left of you VSCode you might notice a hint that you’re now in a Dev Container.
First challenge
But than the first bump in the road started for me. VSCode notices that git is not installed. This can be a bit confusing, but remember the container is all it knows now. The PowerShell container doesn’t include an installation of git (rightfully so.)
You could choose to just install git from the terminal window using the software available in the container, in this case ‘apt’. This would however be lost if for whatever reason you would rebuild the container, rebuilding the container needs to be done everytime you modify the devcontainers.json file. In the beginning probably more often.
Dockerfile
Reading further into the Dev Container documentation it is specified that you can also use a dockerfile. So let’s try that!
Create a ‘Dockerfile’ file in the .devcontainer folder and insert the following contents to use the PowerShell image and install git automatically.
FROM mcr.microsoft.com/powershell:latest

# Note: The DEBIAN_FRONTEND export avoids warnings when you go on to work with your container.
RUN apt-get update && export DEBIAN_FRONTEND=noninteractive \
    && apt-get -y install git
Modify the devcontainer.json file and rebuild the container from the VS Code menu (it prompts you).
{
    "build": { "dockerfile": "Dockerfile" }
}
First hurdle is cleared. The Dev Container is opened again and VS Code doesn’t prompt anymore about the missing git installation.
Extensions
THe next part is having extensions available in the container. Fortunately the devcontainer.json file accommodates this, and is explained in the documentation very clear. The final version of the file is:
{
    "build": { "dockerfile": "Dockerfile" },
    "customizations": {
        "vscode": {
            "extensions": [
                "ms-vscode.powershell",
                "ms-azuretools.vscode-docker"
            ]
        }
    }
}
Pointing to the dockerfile and making sure the PowerShell and Docker extentions are available in the dev container.
Loading modules
The next challenge was loading the required modules into the container, again not having to do manual actions when the containers restarts. To be honest, this took me quite some time. The trick that helped me conquer this challenge was looking at the devcontainer from other projects, and what better example than the great DBATools (Thanks for helping out Roger!).
The final dockerfile looks like the following:
FROM mcr.microsoft.com/powershell:latest

# Note: The DEBIAN_FRONTEND export avoids warnings when you go on to work with your container.
RUN apt-get update && export DEBIAN_FRONTEND=noninteractive \
    && apt-get -y install git

SHELL ["/usr/bin/pwsh", "-c"]
RUN $ErrorActionPreference='Stop'; Install-Module -Name Pester, InvokeBuild, PlatyPS, PSScriptAnalyzer -Force
The three steps in the dockerfile are:
- run the PowerShell base image
- Install git
- install the Pester, InvokeBuild, PlatyPS, and PSScriptAnalyzer modules
Conclusion
This is it. It didn’t take me a very long time to get this running. But then the next question is, was it valuable? To be honest I don’t have a major advantage from using this in a container. This might be a little different if it was SQL Server running in the container. Maybe I need to tweak it a little bit to both have a PowerShell Image and a SQL Server Image running, using docker-compose (if possible).